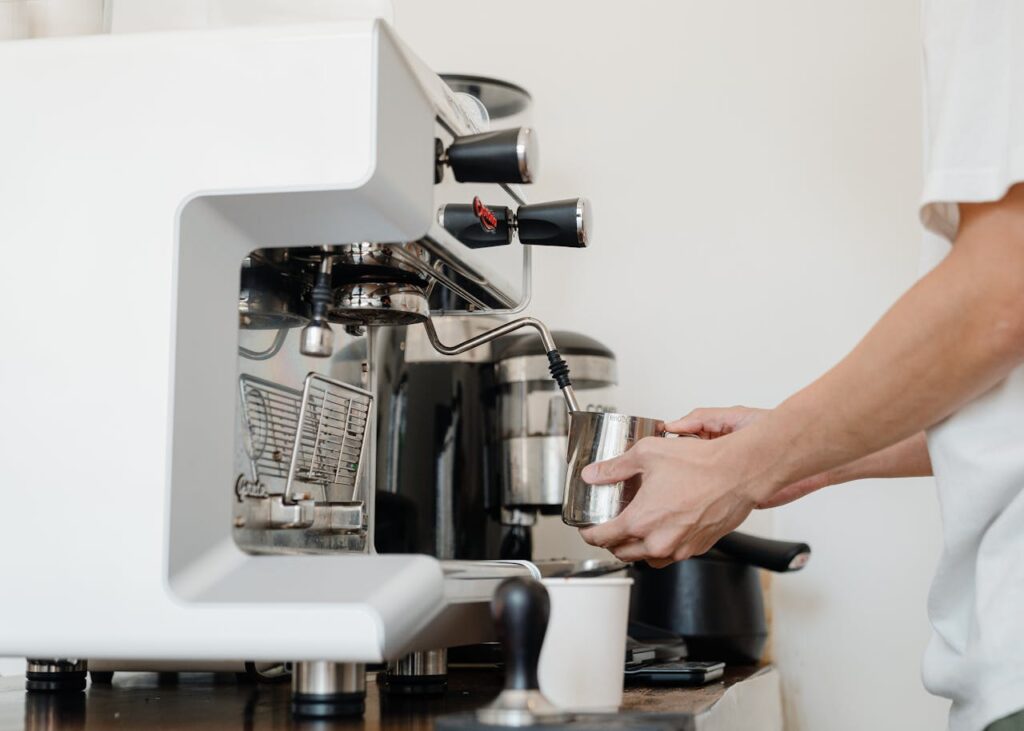
Most people wouldn’t notice if a coffee’s flavor felt routine, but specialty micro-lot beans reveal a new level of complexity. Brewing micro lot coffee requires more than a standard drip pot. It’s about honoring every nuanced note.
Every gear choice you make, from burr grinder to temperature-controlled kettle, directly shapes micro-lot expression. These careful steps matter because boutique farms only produce limited, exceptional batches that deserve greater attention than everyday beans.
Ready to see how the right equipment helps you brew micro lot coffee that genuinely surprises you with every sip? Explore step-by-step guidance, expert recommendations, and real-life examples throughout this article.
Picking the Perfect Grinder to Protect Aromas
Choosing the right grinder ensures your micro-lot beans don’t lose their character during the brewing process. Even slight inconsistencies in grind size can muddle delicate notes.
Consistency here isn’t just about particle size, but about reliably extracting rare aroma compounds found in these beans. A specialty grinder is more than a nice-to-have for brewing micro lot coffee.
Preserving Flavor Through Precise Grinding
Imagine grinding beans for micro-lot coffee on a cheap blade grinder; you get dust mixed with chunks. That’s like coloring with a broken crayon: the results always disappoint, missing the full spectrum.
Burr grinders slice beans uniformly, leading to balanced flavors in each cup. This step is essential when showcasing the subtle floral or fruity characteristics often present in micro-lot beans.
Use a manual or electric burr grinder set to your chosen brew method’s grind. Listen for an even, soft crunch as you grind—that’s your cue that the grinder is doing its job well.
Testing Grind Settings for Your Brew Method
Fine-tune your grinder’s settings for brewing micro lot coffee at home by repeating a short experiment. Grind a small batch, brew as intended, then taste critically for clarity and mouthfeel.
If the cup tastes overly bitter or is congested, adjust the grind finer or coarser. This hands-on calibration gives you concrete feedback rather than relying on generic manufacturer suggestions.
Keep a small notebook or phone note with each micro-lot: record grind, method, time, and flavor impressions. You’ll quickly spot what settings make each lot shine and which to avoid repeating.
| Grinder Model | Consistency Level | Suitable for Micro-Lots? | Actionable Note |
|---|---|---|---|
| Blade Grinder | Poor | No | Upgrade to burr for brewing micro lot coffee |
| Flat Burr Grinder | Excellent | Yes | Ideal for espresso and filter |
| Conical Burr Grinder | Very Good | Yes | Great all-purpose choice for home |
| Hand Grinder | Good to Excellent | Yes | Best for travel or low-volume brewing |
| Grind by Weight | Variable | Depends on model | Consistency is key—test before use |
Pour-Over Essentials: Filters and Drippers for Clarity
Using top-tier filters and drippers highlights the vivid clarity and subtle notes found in micro-lot pours. These two pieces don’t just hold coffee—they define how the liquid moves and extracts during the process.
Switching from generic drip cones to precision pour-over drippers is a practical move if you want brewing micro lot coffee to taste crisp and nuanced, rather than muted or muddy.
Comparing Dripper Shapes and Materials
Cone shapes like the V60 encourage rapid water flow, leading to a lively, clean cup. Flat-bottom designs such as Kalita Wave, on the other hand, slow extraction, emphasizing heavy body and gentle sweetness.
Ceramic drippers retain heat best, but plastic models don’t shatter and are more forgiving to preheat. Glass lets you watch the extraction bloom—helpful for visually fine-tuning blooming and pouring.
For brewing micro lot coffee, test different shapes and materials. Ask yourself: “Which flavor profile do I want—brighter and floral or rich and rounded?”
- Choose a cone dripper (e.g., Hario V60) to highlight acidity and clarity in your micro-lot coffee; pour steadily, center-out, for even extraction.
- Pick a flat-bottom dripper (e.g., Kalita Wave) if you want a rounder cup with balanced body; ensure even grounds distribution before pouring.
- Use quality paper filters that fit perfectly, as poor seals cause channeled brews and lost complex notes in your micro-lot coffee.
- Rinse paper filters with hot water to remove papery flavors and warm your dripper—never skip this step, or delicate flavors can disappear.
- Start each pour with a steady, slow bloom phase using about twice the dry coffee’s weight in water, gently agitating grounds for robust extraction.
Consistency across these preparation choices will always support brewing micro lot coffee that does its origin justice, not just fill a mug.
Paper vs. Metal Filters: Which to Choose and When
Paper filters trap more micro-fines and oils, making micro-lot coffee taste exceptionally clean—best for revealing rare florals and nuanced acidity. Metal filters permit more oils into your cup, adding body, but can obscure the most delicate aromas.
- Use thick paper filters for high acidity-centric lots, ensuring extreme clarity in each cup. Thin filters may clog, so always match filter thickness to grind size and flow.
- Prefer metal mesh for earthy or bold micro-lot profiles; expect heavier body and pronounced mouthfeel, useful for chocolatey or nutty beans.
- If unsure, taste side-by-side: brew the same lot with both filter types and note how aromatics, aftertaste, and body shift. Pick the filter that accentuates your bean’s highlights.
- Swap filters based on your mood or company: serve paper-filter pour-overs when highlighting the nuanced spectrum for coffee-curious friends or metal filters when sharing robust, crowd-pleasing brews.
- Commit your impressions to a logbook, building a filter-to-bean pairing guide over time. Use this for brewing micro lot coffee more intentionally session by session.
If a session ever tastes bland or overly oily, change either the filter or grind—quick pivots lead to sweeter, cleaner results as you refine your home toolkit.
Water Matters: Enhancing Specialty Flavor Expression
Dialing in your water quality and temperature transforms brewing micro lot coffee, letting every origin note shine. Use filtered or mineral-balanced water to reduce unwanted flavors.
Temperature stability is your secret weapon. Brewing with water that dips below 195°F may soften flavor impact, while above 205°F can mute uniqueness, especially with sensitive small-batch beans.
Balancing Minerals for Peak Extraction
For specialty micro-lots, use water with moderate hardness—aim for around 70–150 ppm. Too soft, and your coffee tastes flat; too hard, and you’ll pick up chalky, unwelcome notes.
Premixed coffee water packets exist for this purpose, or carefully mix distilled with a dash of mineral drops. Pay attention to mouthfeel: balanced water yields syrupy, sweet brews without distracting minerality.
Log your water sources and results; adjust if your best brewing micro lot coffee experiments end up lifeless or overly sharp. Repeat as you try single-origin beans from new producers each month.
Temperature Control Step-by-Step
Start with a variable-temp kettle, set specifically to 201°F. Preheat your vessel and pour-over gear so you don’t lose thermal momentum mid-brew. Precision matters most with micro-lot coffees that peak within a narrow temperature range.
If your kettle lacks those controls, bring water to a boil and let stand uncovered for 45–60 seconds. That small wait window aligns temperature with most pour-over sweet spots.
Stick a thermometer in your water as a sanity check when trying new lots; slight shifts in temperature can alter fruitiness or acidity, so document and repeat what puts micro-lot flavors forward.
Precision Scales and Timers for Consistent Results
Using a precision scale and accurate timer ensures your recipes are repeatable, not a lucky accident. Whether you’re brewing micro lot coffee for yourself or sharing, consistency sets serious enthusiasts apart.
Record weights to a tenth of a gram and time each extraction phase. This discipline highlights which brewing changes impact result flavors, particularly in small-batch micro-lots.
Weighing Doses for Repeatable Cups
Always weigh your coffee dose and water with a digital scale. For a V60 using 20 grams of micro-lot coffee, the correct water-to-bean ratio supports full flavor development, every time.
Give yourself a familiar cue: “When my scale hits 300 grams, I’m ready to end the pour.” This rhythm reinforces accuracy and makes flavor tweaks clearer next session.
Never eyeball your dose when brewing micro lot coffee—you’ll miss subtle improvements from intentional, measured changes in ratio.
Timing Extraction in Real Time
Hit your timer as you pour water; track each phase—bloom, pulse pours, and final drain. Micro-lots are sensitive; even a 15-second over-pour can create sharp bitterness from otherwise delicate beans.
Set a visual reference by splitting timing into segments: “forty-five seconds for bloom, then finish pouring by two minutes.” This helps spot where you rushed or lingered.
Use your phone or a simple kitchen timer. App-connected scales are fun, but don’t wait to upgrade. Use what you have today to lock in your best brewing micro lot coffee habits.
| Tool Name | Key Use | Scale Accuracy | Main Takeaway |
|---|---|---|---|
| Basic Kitchen Scale | Weighing coffee and water | 1g increments | Good for beginners, upgrade for more precision |
| Coffee-specific Scale | Timers and finer dose control | 0.1g increments | Use for reliable brewing micro lot coffee recipes |
| Timer-only Device | Extraction phase timing | — | Works if your scale lacks timer but less streamlined |
| App-connected Scale | Recipe recording, sharing | 0.1g increments | Automates note-keeping—use if you like tech solutions |
| Analog Stopwatch | Consistent pours | — | Low-tech and portable for traveling setups |
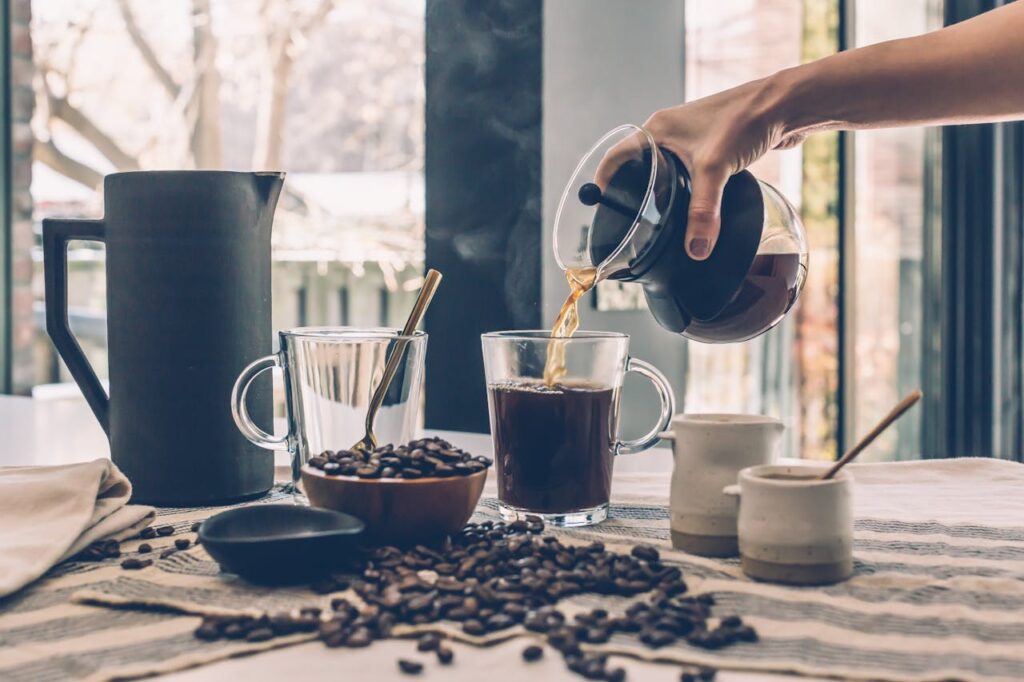
Brewing Vessels and Serving Pitchers That Show Off Micro-Lots
Delicate brewing vessels and smart servers impact flavor and sharing for brewing micro lot coffee. Thin-walled glass carafes and thermal servers retain nuanced aromas better than bulky mugs.
Consider how serving shape highlights aroma and flavor: a tulip-shaped cup will intensify aromatics, while wider vessels tend to exaggerate sweetness and body. This matters more for rarer beans.
Visual Cup Clarity vs. Thermal Stability
Choose a glass server for brewing micro lot coffee if you’re observing clarity—watch color, extract depth, and bloom. You’ll also see sediment settle and adjust your pour technique over time.
Ceramic vessels insulate better but mask liquid nuance. If you frequently serve multiple rounds, a thermal carafe keeps micro-lot batches as fresh in the last cup as the first, especially in longer conversations.
Rotate between glass, ceramic, or double-walled metal servers based on session needs. Record flavor shifts to refine your setup—all affect aroma, temperature, and mouthfeel differently.
- Use heat-retaining cups for longer sipping, colder rooms, or guests who savor each pour over lots of conversation.
- Prefer thin-lipped, tulip-shaped cups for bright or floral micro-lots—directs aromatics precisely, boosting perception of fleeting, complex notes.
- Opt for wide bowls for syrupy or chocolatey micro-lots; this amplifies body and lingering sweetness in specialty cups.
- Swap servers and cups mid-session to experience contrast; note which vessel showcases the most memorable flavor evolution per micro-lot batch.
- Pair vessel choices with specific brewing micro lot coffee recipes and serve-back-to-back, letting everyone present vote on their favorite combination.
Every step—right down to your serving pitcher—plays a part in distinguishing micro-lot coffee from routine cups. Personalize your setup for every batch.
Handy Accessories: Thermometers, Stirring Tools, and More
Strategic accessories perfect the home barista’s process. A thermometer and gentle stirring tool take brewing micro lot coffee from everyday to exceptional by eliminating variables the eye can’t judge alone.
Keep a thermal thermometer handy, especially for initial tests. Combine this with a bamboo stirrer or coffee-specific paddle—these tools prevent channeled extraction and encourage even flavor development in micro-lots.
Checklist for Must-Have Add-Ons
This micro-checklist fine-tunes each cup of brewing micro lot coffee:
- Measure temperature before every pour-over session; log data for consistency and troubleshooting over time.
- Stir the bloom gently with a wood or silicone tool; break up dry clumps for more even, lively extractions in micro-lots.
- Use a single-cup scale if prepping smaller lots to avoid batch-to-batch errors common in multi-cup or guessing setups.
- Store beans in a vacuum canister, away from light and heat; fragile flavors fade quickly if left in the bag after opening.
- Have a soft brush ready to clear grinder chambers and burrs between batches; mixing micro-lots in the same grinder can cross-contaminate subtle profiles.
Treat accessories as extensions of your hands—purposeful tools that draw out nuanced expressions within each unique micro-lot coffee.
Wrapping Up Specialty Micro-Lot Brewing: Your Home, Your Rules
Everything you choose, from grinder to filter to vessel, shapes brewing micro lot coffee into a unique home ritual. Each gear decision builds clarity, balance, and respect for these limited, expertly grown beans.
Cultivating intention through record-keeping and trial breeds better cups over time—not just for micro-lots, but for everything you brew. These small-batch beans reflect their origin and your evolving skill as a coffee enthusiast.
Next time you unseal a rare micro-lot, trust your sharpened observation and toolkit. The joy comes from firsthand discoveries and sharing vivid, expressive flavors with others.
Frequently Asked Questions
Q: What makes a micro-lot coffee “specialty”?
Micro-lot coffee typically comes from a single plot on a farm or a specific harvest, processed and selected for exceptional quality. Farmers invest extra care into these lots, resulting in distinct flavors, aromas, and traceability that make each one unique.
Q: Can I use a regular blade grinder for brewing micro lot coffee?
It’s possible but strongly discouraged. Blade grinders produce inconsistent particle sizes, muddling flavor and clarity. A burr grinder or hand grinder delivers more uniform results, which is critical for showcasing the complex notes of micro-lot beans.
Q: Do I really need a scale and timer at home?
Absolutely. Precision in measurement and timing ensures you can repeat recipes and reliably brew micro lot coffee that displays hallmark acidity, sweetness, or aroma. Even minor changes in dose or timing impact your final cup’s clarity and balance.
Q: How do I store opened micro-lot beans to preserve freshness?
For best preservation, use a vacuum canister or airtight container, keep away from heat and light, and only grind the amount you need right before brewing. Avoid storing micro-lots in the fridge or freezer once opened, as condensation harms flavor integrity.
Q: Is it necessary to buy specialty water for micro-lot coffee?
Not always, but water quality directly influences flavor. Use filtered or mineral-balanced water for extraction. Test your tap water—if it’s too hard or soft, consider premixed minerals or blending distilled and filtered water for brewing micro lot coffee.