The prospect of roasting limited-edition specialty coffee micro-lots at home draws in both newcomers and seasoned enthusiasts alike. These green beans, prized for unique flavors and limited supply, beg for careful attention whenever home roasting coffee routines are discussed or experimented with.
Specialty micro-lots offer a chance to personalize flavor development while bringing the journey of coffee from farm to cup under your own roof. Each roast tells a story—distinct from commercial blends—if you learn to read the signs in aroma, sound, and color.
This article explores the most effective ways to elevate your home roasting coffee game, ensuring rare and limited green beans reach their full potential. Let’s dive into the intricacies with actionable insights, real examples, and expert guidance.
Dialing in Optimum Roast Levels with Micro-Lots
Choosing the right roast level for home roasting coffee delivers the best flavor expression from specialty micro-lots. Instead of relying on guesswork, targeted observation and clear cues help you get repeatable results.
Roast progression in micro-lot beans signals their readiness through changes in aroma, bean color, and the audible cracks during roasting. Noticing each sign guides you to stop roasting at exactly the right moment.
First Crack versus Second Crack: Timing Your Finish
First crack signifies the start of development as water vapor escapes, producing that signature popping sound. For fruity and floral micro-lots, you’ll usually want to end shortly after the first crack to lock in brighter notes.
Second crack is drier and sharper, usually indicating a darker, bolder roast that’s riskier for delicate micro-lots. Stopping before second crack preserves unique flavors present in rare beans and prevents muddling acidity and sweetness.
Imagine you hear those pops—wait for about 30–45 seconds, then cool immediately if seeking juicy acidity, just as a professional would with prized green micro-lots.
Color and Surface Sheen: Judging Development by Eye
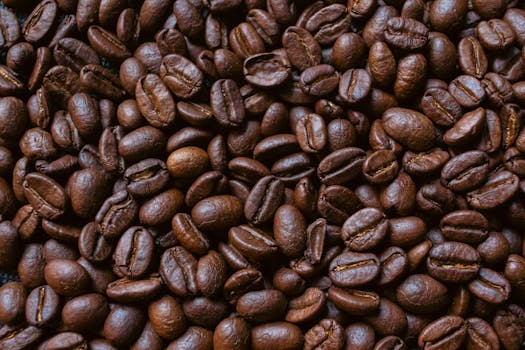
Visual cues deliver reliable instant feedback, even when roasting without a thermometer. A cinnamon to light brown color supports high-altitude micro-lots’ delicate profiles, while any oil on the surface signals overdevelopment for these rare beans.
Hold a bean under natural light—if you spot uniformity and a matte tone, you’ve likely hit the sweet spot with your home roasting coffee. If in doubt, cool a few and taste test side by side with your baseline roast.
As a rule of thumb, chart color progressions on a batch log to fine-tune future roasts—one sentence: “Beans should look matte and evenly colored, not shiny or deeply browned, when you pull them for nuanced micro-lots.”
| Roast Signal | Observation Method | Flavor Outcome | Recommended Action |
|---|---|---|---|
| First Crack | Audible pop | Bright acidity, floral aromas | End roast soon after |
| Color Shift | Pale to cinnamon brown | Nuanced, layered notes | Monitor closely |
| Onset of Oils | Surface sheen | Flattened profile, bitterness | Stop before this point |
| Second Crack | Faster, sharper snaps | Bolder, roasty flavors | Stop earlier for micro-lots |
| Temperature Spike | Probe/roaster readout | Risk of scorching | Cool immediately |
Choosing Equipment for Micro-Lot Home Coffee Roasting
Selecting the right gear boosts your consistency when home roasting coffee, especially with high-value green beans. Consider what you need for control, repeatability, and safety.
Small-batch micro-lots often respond best to equipment that offers airflow and temperature tweaks. Examples include air poppers, drum roasters, and convection-driven home machines—each with unique learning curves and flavor results.
Essential Home Roasting Gear Explained
Each type of device influences bean movement, heat transfer, and aroma retention. A popper offers quick accessibility but limited precision—you’ll get lively acid notes but may struggle to control development time.
- Use an air popper: Fast, affordable, but limited capacity and uneven roast. Suits experimenting with micro-lot sample roastings.
- Try a dedicated sample roaster: Greater control for airflow and timing, yielding reliable results for rare green beans.
- Pick a drum roaster: Best for layering flavors and scaling up small-batch roasts—ideal for those who roast weekly or more.
- Opt for convection-style oven: Useful for trying multiple batches, but monitor closely to prevent scorching.
- Stay manual with skillet or stovetop: Interactive, allows stepwise checking, but demands attention and rapid cooling access.
Fine-tune your setup to match your micro-lot’s origin and processing method—always log what works best as you compare devices using the above options.
Key Maintenance Habits
Keep chaff clean-outs ready before and during home roasting coffee sessions; residual debris can ignite and impact flavor. Always inspect moving parts for oil or dust since buildup can reduce temperature accuracy.
- Wipe out chaff baskets and trays after every batch to prevent stale aromas from contaminating future roasts.
- Monitor vent paths for buildup—clear airflow is crucial to even roasting, especially with highly aromatic micro-lot beans.
- Check thermometers and sensors function before each session; micro-lots rely on precise temperature shifts.
- Grease moving parts on manual roasters sparingly, preventing flavor contamination and prolonging the equipment’s life.
- Store green coffee beans in cool, airtight containers near your roasting station—limit exposure to heat or light between sessions.
Attentive care keeps your equipment safe and ensures every micro-lot reveals its best in the cup. Build routine checklists for every step described and update them with each new roast experience.
Customizing Profiles for Micro-Lot Origin Differences
Building distinct roast profiles lets you tune your home roasting coffee approach to match each specialty micro-lot’s processing and origin traits. Skip one-size-fits-all charts and lean into experimentation—guided by small, tracked adjustments.
Many micro-lot producers label bags with altitude, variety, and process data. Use this info for baseline choices. For example, high-altitude, washed Ethiopian beans might thrive under a quick, high-heat start and short development.
Sequencing Your Test Roasts
Set up three trial profiles: one fast/light, one steady/medium, and one slower/darker. Record every change in a log, noting aroma, crack timing, and post-roast flavors using a simple tasting wheel or your own descriptors. Tweak your plan by cup feedback, not assumptions.
Start future home roasting coffee sessions with your top performer from these early trials. Adjust by five-degree increments or 30-second intervals per roast for gradual, predictable improvements—no big shifts unless results demand it.
End every session with a blind cup test, tasting without knowing which profile it is. This keeps your focus on flavor, not batch order, which helps avoid “first batch bias.”
Adjusting for Processing Methods
Natural-processed micro-lots usually show more sweetness and body, so a gentler ramp (lower, slower heat) preserves their complex notes. Washed-process beans shine with bright, fast heat for aromatic intensity—think playful, berry-like Costa Rican micro-lots.
Use a flavor memory as a guide—“My last washed Ethiopia had lavender and citrus; I’ll front-load heat, then drop quickly after first crack,” for real-world recipes.
This method also teaches consistency. Each tweak, logged and cupped, becomes data for future home roasting coffee batches. If a friend loves blueberry notes and you nailed them once, refer back to that profile.
Timing, Cooling, and Storage That Maximize Micro-Lot Freshness
Controlling finish time and immediate cooling makes or breaks a home roasting coffee outcome with specialty green beans. Micro-lots deserve an active, stepwise approach to lock in their volatile aromatics right at roast’s end.
Have an external cooling tray, colander, or even a metal mesh laid out before you start—the time from end of roast to ambient temperature must be under a minute for best effects in cup aromatics retention.
Step-by-Step Cooling Routine
Once your micro-lot batch hits the exact finish point (guided by crack or color), dump beans instantly into your cooling tray. Agitate by shaking or stirring to increase air contact and speed up heat loss.
This abrupt stop prevents the core from overcooking, a common error with home roasting coffee where delicate micro-lot flavors can rapidly deteriorate at high temps. Your nose will confirm when cool air hits—a rush of sweet aroma signals the batch has stabilized.
Let beans rest exposed for 2–3 minutes, then store in a paper bag or one-way valve container. Log final weight for quality control—water loss gives another window into development accuracy.
Post-Roast Storage Rules
Once your micro-lot cools, shield it from air and light. Use a vacuum canister or bag with a one-way valve to keep oxygen out and preserve volatile compounds. Label each batch with roast date, roast profile, and initial tasting notes.
Allow at least 12–24 hours for degassing before brewing—the cup clarity increases remarkably for floral or high-altitude home roasting coffee after a day’s rest. For naturals, give them up to 48 hours if berry or wine notes show up heavily.
Always taste in intervals: Day 1, then Day 4, then Day 7. Limited-edition beans deliver evolving flavors. This helps track when each micro-lot hits peak cup expression.
Adapting Sensory Skills Through Home Roasting Practice
Building a sensory log isn’t just for pros; anyone home roasting coffee can level up tasting skills with a basic notebook and a structured approach. Jotting impressions (hot and cooled cup) links roast choices to real cup outcomes.
Use color, aroma, and sensory cues for every batch. Act like a tasting detective: “Does this floral Kenya micro-lot taste grassy, or is it crisp and clean?”—then align notes with roast timing, cooling, or equipment used.
Developing a Flavor Reference Library
Design a simple chart for each coffee. Include the bean’s region, process, tasting notes, and your rating from 1 to 10 on body, acidity, and finish. Log how the cup changes between days one and four post-roast.
Compare your findings with widely available tasting wheels or flavor lexicons. If not, invent your own—write “reminds me of apricot jam” if that’s what you sense from a Guatemalan micro-lot roast.
This iterative approach keeps home roasting coffee creative and data-driven. Review flavor notes before each new roast to avoid past pitfalls and chase positive surprises.
Example: Logging a Standout Micro-Lot
Let’s say you roast a 100g batch of honey-process micro-lot in an air popper. You track fast first crack, cinnamon color, and 45-second development time. Day two, cup’s got caramel and peach—write this verbatim in your notes.
Decide the batch needs more clarity, so next time, you’ll try a drum roaster for a slower development phase. Notate every tweak and result, even unexpected ones, so your routine evolves with the quality of limited micro-lots on hand.
Your journal forms a personalized reference, letting you spot what works best and confidently guide future home roasting coffee adventures.
Concluding with Practical Micro-Lot Roasting Wisdom
Roasting specialty coffee micro-lots at home means building a routine around observation, careful record-keeping, and responsive habits. Each micro-lot deserves bespoke attention and rewards persistence with fresh, layered flavors that eclipse off-the-shelf blends.
Every round of home roasting coffee adds to your personal playbook—ensuring you adapt, experiment, and refine with each new limited green bean batch. Your confidence will grow as you identify favorite profiles for different origins and processes.
The deeper you engage with the sensory journey, the more each cup becomes a celebration of exceptional beans. Enjoy exploring, and trust the process to reveal the best of every micro-lot you bring home.
Frequently Asked Questions
What makes specialty micro-lots unique for home roasting coffee?
Specialty micro-lots offer rare, traceable origins and limited-run flavors that aren’t found in mainstream beans. Home roasting coffee with these beans lets you experience distinct taste notes and develop roast profiles tailored to individual micro-lot characteristics.
How should I store unused green coffee micro-lots?
Store green micro-lots in airtight, opaque containers, away from strong odors, moisture, and sunlight. For best results, keep containers in a cool pantry or dedicated coffee storage box in your kitchen until ready for home roasting coffee.
How can I highlight a micro-lot’s best flavor traits when roasting at home?
Log roast start-to-finish details, focusing on first crack, visual cues, and aroma. Use shorter roasts for fruitiness or longer for chocolate notes. Taste at your preferred brewing method and recalibrate for each new batch—refining your home roasting coffee approach by sensory feedback.
Can I use any equipment for micro-lot roasting?
While you can use basic stovetop methods, drum and sample roasters provide better control over temperature and airflow. Every micro-lot is precious, so match your roasting device’s features with bean style to optimize for home roasting coffee.
Why is rapid cooling critical after roasting micro-lots?
Specialty beans retain their unique flavors only if cooled immediately post-roast. Delays can result in overdevelopment or muted aromatics. Use a baking sheet or mesh tray to speed cooling and protect limited-edition micro-lots during the final phase of home roasting coffee.